

If you’ve ever attended a conference or tried to keep score in a particularly chaotic board-game night, you’ve probably thought “There has to be a better way to do this.”
Well… we thought the same. And instead of leaving that thought floating in the ether, right next to unused gym memberships and abandoned side-projects, we decided to actually build something.
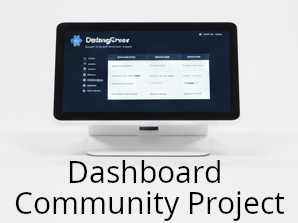
Welcome to the DebugCrew Community Dashboard Project, a public, step-by-step journey where we take a concept that could easily be scribbled on a napkin and turn it into a fully-fledged embedded product. No magic, no shortcuts, no “and then a miracle occurs” moments. Just solid engineering practices, hard technical choices, small victories, inevitable mistakes, and an unhealthy amount of enthusiasm for microcontrollers.
In this series, we’ll walk through everything:
- the raw initial requirements (yes, even the unrealistic ones),
- the component selection roulette,
- design trade-offs that keep us awake at night,
- and finally the actual implementation: hardware, firmware, and the aesthetic decisions that make a gadget look like a product instead of a school project.
Whether you’re a professional embedded designer or a weekend tinkerer who thinks “just one more feature” is a personality trait, this project is for you. You’ll get to see not just what we build, but why we make each decision, the kind of knowledge you rarely find neatly packaged in datasheets.
So buckle up, we’re about to turn a simple community idea into a real, working dashboard and have some fun along the way.
Project Requirements:
Before we start arguing about microcontroller families, or pretending we don’t care about aesthetics, every proper project needs one thing: clear requirements.
For our Community Dashboard, the goal is simple in spirit but ambitious in practice: build a compact, battery-powered, dual-display device that works equally well at a busy tech conference and at a board-game table where diplomacy has already failed.
Here’s what we’re working with:
1. Physical Dimensions: Pocketable…-ish
The device should clock in at approximately 20 cm (L) × 7 cm (H) × 5 cm (D).
Not exactly pocket-sized, unless you wear cargo pants, but compact enough to sit comfortably on a table without becoming a piece of furniture.
2. Dual Display Setup: One for You, One for the World
This dashboard isn’t shy: it wants to talk both to its user and to the environment.
- Primary display (User-facing):
A 6–7 inch screen, roughly smartphone-sized.
This is where configurations, menus, and interactions happen. It needs to be crisp, responsive, and readable in different lighting conditions. - Secondary display (External-facing):
Same width but shorter in height, designed purely for output.
Think: name and surname during a conference, team information during a workshop, or game stats.
This dual-viewport approach creates interesting design challenges: two display drivers, two UX contexts, and two sets of power consumption patterns we’ll need to tame.
3. Short-Range Connectivity: Small Packets, Big Purpose
The device will support short-range wireless communication optimized for packet sizes around 1 kB.
This suggests lightweight protocols, efficient message handling, and antennas that work well inside our compact enclosure without fighting for space with batteries and key matrices.
Expect tough decisions here: BLE? Sub-GHz?
Whatever we choose, reliability and low power will be our mantra.
4. A 20-Key Programmable Keyboard: Because Buttons Are Fun
About 20 programmable keys will sit on the front panel, ready to adapt to any use case:
- quick actions during conferences
- shortcuts for game scoring
- macros for custom functions
A keypad this large means matrix scanning, debounce strategies, event queuing, and mechanical considerations. It’s a small subsystem by itself and a playground for firmware elegance.
5. Battery Life: It Must Survive Human Events
This dashboard is designed to last longer than the average conference attendee.
- Rechargeable batteries: at least 8 hours of continuous use
- Non-rechargeable batteries: at least 48 hours
This requirement heavily influences display choice, communication modules, power regulators, and even the microcontroller’s sleep strategies.
Wrapping Up the Specs
Taken together, these constraints define the backbone of our device. They give us a sandbox that’s big enough to be fun but small enough to be a challenge, the sweet spot for any embedded project worth sharing.